Dogs are known to occasionally take a sip or two from an open toilet bowl, but as humans, we typically cringe if we are touched by a drop of toilet water. How dirty is your toilet water? In this easy science experiment, you can test and compare toilet water to find out what’s really in there.

Supplies
The first thing you need to do is gather your supplies:
- Test Assured 4 Test Kit Set with TD Meter
- Disposable plastic cups
- Paper towels

Preparation
To prepare for the tests, you’ll need to gather your water samples. We used tap water for the control and two toilet water samples. We decided to test the toilet water before and after cleaning. Here are the three samples you need to collect:
- Tap water for your control
- Toilet water before cleaning
- Toilet water after cleaning
Children should be supervised while collecting toilet water samples. We found that one of the easiest ways to collect toilet water samples was to dip a plastic cup into the water and insert it into another cup to catch any drips. As an extra precaution, you may want to wear a pair of disposable gloves while conducting this experiment. We typically do our water test experiments in the kitchen, but for sanitary reasons, we completed this test in the bathroom.
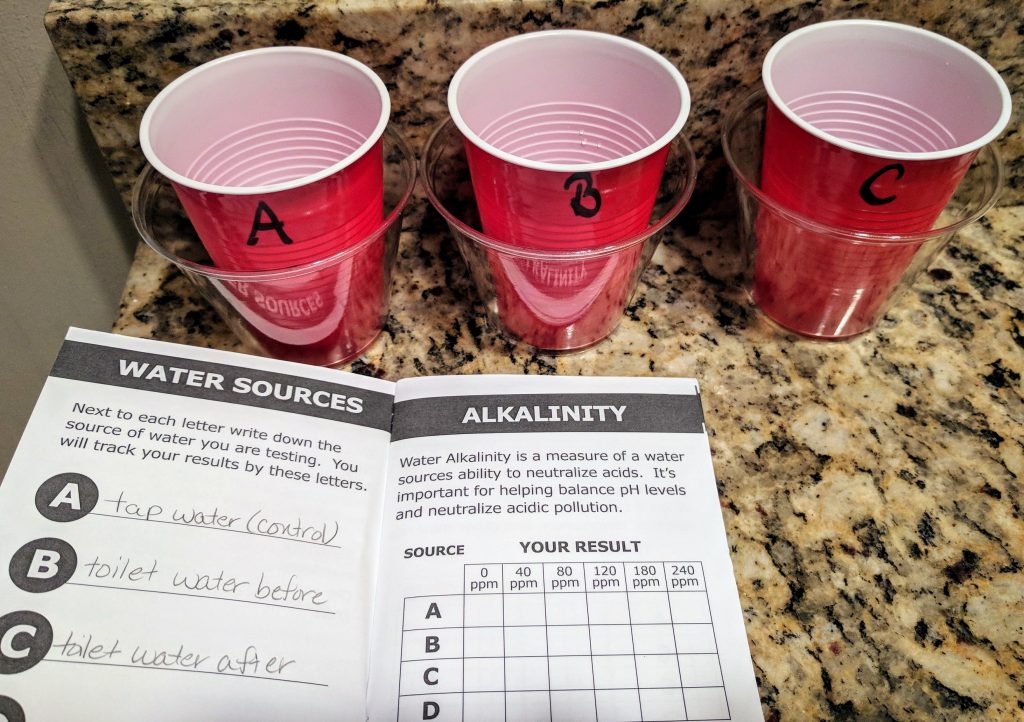
Now is a good time to label your vials and write your water sources in the results notebook.
Testing
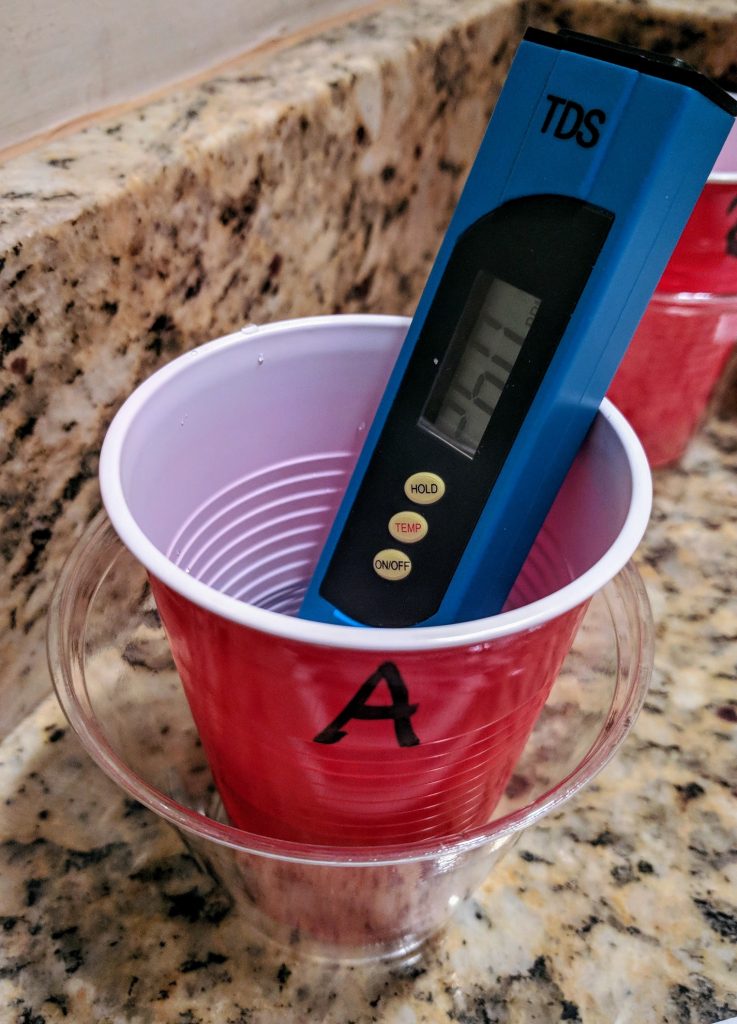
The first test you want to start with is for total dissolved solids, using the TDS meter. The meter will not fit in the test vials, so it is easier to complete this part of the experiment while your samples are still in the plastic cups. To perform the TDS test, simply turn on the meter and submerge the prongs in the samples. Rinse the meter with clean water between each test. Record your results in the results notebook. When you have finished the TDS testing, it is a good idea to dip the meter in some bleach water to sanitize it.
After completing the TDS test, you will need to pour your samples into the vials you labeled. Do this over a sink and be sure to wipe up any spills, so you don’t contaminate the test strips.
Before you get started with the tests, now is a good time to make some visual observations. Take notes about how clear or cloudy your samples look. Are there any visible particles floating in any of the samples? These observations can be written in the “Notes” on the last page of the results notebook.
Now you’re ready to get started with the rest of the tests. It’s easiest to work with one sample at a time. Follow these instructions to complete the remaining tests.
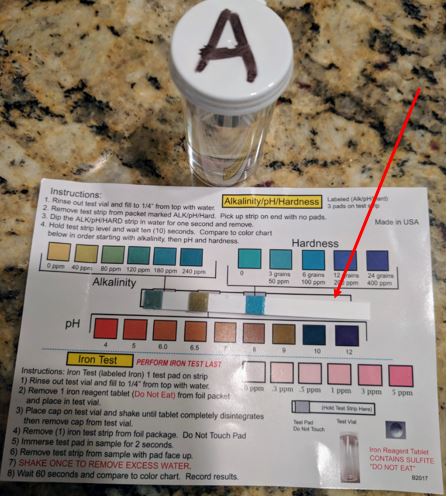
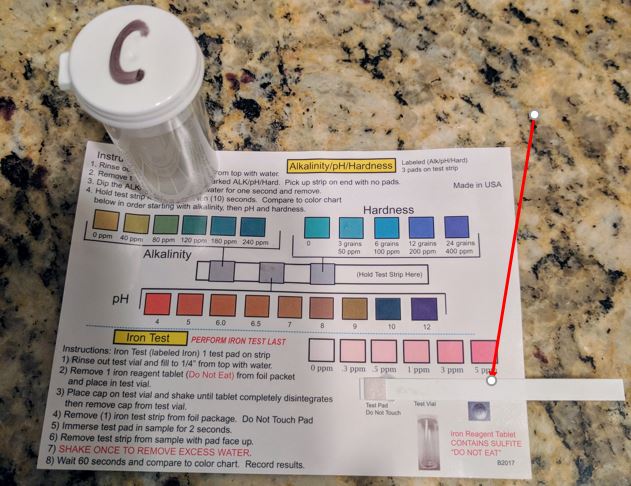
Alkalinity/pH/Hardness Test
- Remove the test strip from the packet labeled, “ALK/pH/Hard”
- Pick up the strip on the end with no pads
- Dip the strip in the sample for one second and remove
- Hold the test strip level and wait 10 seconds
- Place the strip as shown in the picture and compare to the color chart for alkalinity, pH, and hardness
- Record your results in the results notebook
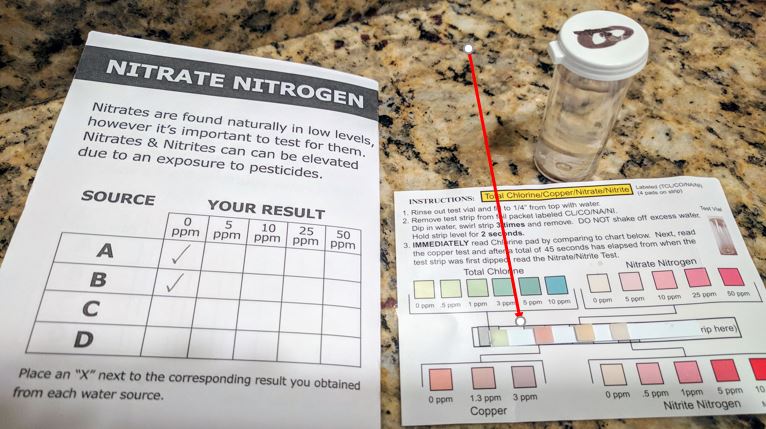
Total Chlorine/Copper/Nitrate/Nitrite Test
- Remove the test strip from the packet labeled, “CL/CO/NA/NI”
- Pick up the strip on the end with no pads
- Dip the strip in the sample three times and remove – DO NOT SHAKE OFF EXCESS WATER
- Hold the test strip level for 2 seconds
- Place the strip as shown in the picture and compare to the color chart for chlorine and copper
- Wait 45 seconds before reading the results for nitrate and nitrite
- Record your results in the results notebook
Iron Test (Complete this test last)
- Remove one iron reagent tablet from the foil packet and place in test vial (the reagent could alter the results of other tests which is why the iron test is completed last)
- Place the cap on the test vial and shake for approximately one minute, until the tablet is completely dissolved
- Remove the test strip from the packet labeled, “Iron Test”
- Dip the strip in the sample for 2 seconds
- Shake the strip once and wait 60 seconds
- Place the strip as shown in the picture and compare to the color chart for iron
- Record your results in the results notebook
Repeat all three tests for each of your samples. When you are finished don’t forget to wash your hands with soap and water.
Results
Now that you have completed each of the four tests on your three samples, it’s time to look at your results. Ask yourself these questions:
- Was there a difference between the toilet water before and after it was cleaned?
- How did the toilet water samples compare to the tap water sample?
- Do you think it’s harmful for dogs to drink toilet water?
- What results did you find the most surprising?
Record your answers on the “Notes” page. You can use clear tape to fix the test sticks to the color charts to display your results for your science fair project.