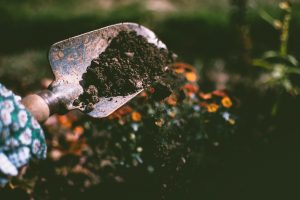
If your kids don’t mind a little dirt, they’re sure to enjoy this easy to perform science project testing dirty water. The first step is easy. Send the kids outside to collect three different dirt samples. Maybe scoop up some dirt from a potted plant or a garden area. Dig up a little bit of dirt and grass. Collect some mulch. Sweep up some grit from the street. Get yourself a School and Science Fair Test Kit from TestAssured and you have everything you need for a fun science experiment.
Supplies
The first thing you need to do is gather your supplies:
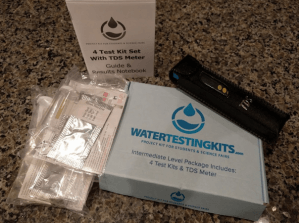
- Test Assured 4 Test Kit Set with TDS Meter
- 4 cups
- 3 dirt samples
- Paper towels
Preparation
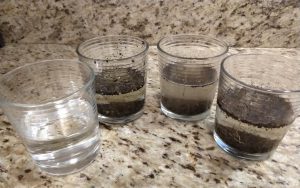
To prepare for the tests, you’ll need to make your dirty water samples. Fill the first cup with plain tap water. This will be the control that the other samples are measured against. Put one dirt sample in each of the remaining cups. Fill the cups halfway with tap water. You need enough water that the dirt can be easily mixed into the water, but avoid filling the cup too much so you don’t splash dirty water everywhere. Once each cup has been mixed, you’ll want to wait about a half hour for the dirt to settle to the bottom.
Now is a good time to label your vials and list the sources of your dirty water samples in the results notebook.
Testing
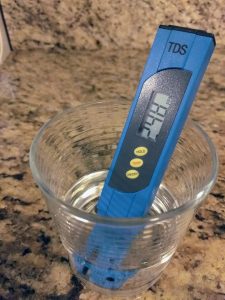
First, you will start with the test for total dissolved solids, using the TDS meter. Because the meter will not fit in the test vials, it is easier to complete this part of the experiment while your samples are still in the cups. To perform the TDS test, simply turn on the meter and submerge the prongs in the samples. Rinse the meter with clean water between each test. Record your results in the results notebook. Be sure to read the TDS meter carefully. High readings will be noted with “x10.”
After completing the TDS test, you will need to pour your samples into the vials you labeled. Do this over a sink and be sure to wipe up any spills, so you don’t contaminate the test strips.
Before you get started with the tests, now is a good time to make some visual observations. Take notes about how clear or cloudy your samples look. Are there any visible particles floating in any of the samples? These observations can be written in the “Notes” on the last page of the results notebook.
Now you’re ready to get started with the rest of the tests. It’s easiest to work with one sample at a time. Follow these instructions to complete the remaining tests.
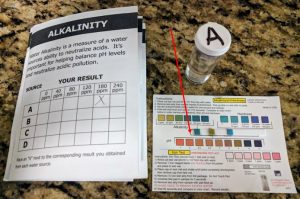
Alkalinity/pH/Hardness Test
- Remove the test strip from the packet labeled, “ALK/pH/Hard”
- Pick up the strip on the end with no pads
- Dip the strip in the sample for one second and remove
- Hold the test strip level and wait 10 seconds
- Place the strip as shown in the picture and compare to the color chart for alkalinity, pH, and harness
- Record your results in the results notebook
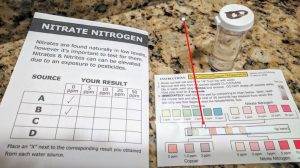
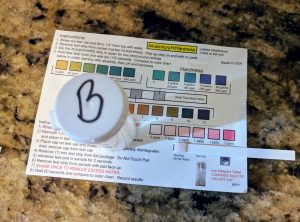
Total Chlorine/Copper/Nitrate/Nitrite Test
- Remove the test strip from the packet labeled, “CL/CO/NA/NI”
- Pick up the strip on the end with no pads
- Dip the strip in the sample three times and remove – DO NOT SHAKE OFF EXCESS WATER
- Hold the test strip level for 2 seconds
- Place the strip as shown in the picture and compare to the color chart for chlorine and copper
- Wait 45 seconds before reading the results for nitrate and nitrite
- Record your results in the results notebook
Iron Test (Complete this test last)
- Remove one iron reagent tablet from the foil packet and place in test vial (the reagent could alter the results of other tests which is why the iron test is completed last)
- Place the cap on the test vial and shake for approximately one minute, until the tablet is completely dissolved
- Remove the test strip from the packet labeled, “Iron Test”
- Dip the strip in the sample for 2 seconds
- Shake the strip once and wait 60 seconds
- Place the strip as shown in the picture and compare to the color chart for iron
- Record your results in the results notebook
Repeat all three tests for each of your samples. When you are finished don’t forget to wash your hands with soap and water.
Results
Now that you have completed each of the tests on your four samples, it’s time to look at your results. Ask yourself these questions:
- How did the control sample differ from the dirty water samples?
- Did any of the dirty water samples contain more contamination than the rest?
- What results did you find the most surprising?
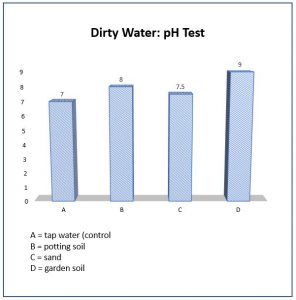
Record your answers on the “Notes” page. If you are doing a science project, create a graph to show your results. You can also use clear tape to fix the test sticks to the color charts to display your results.